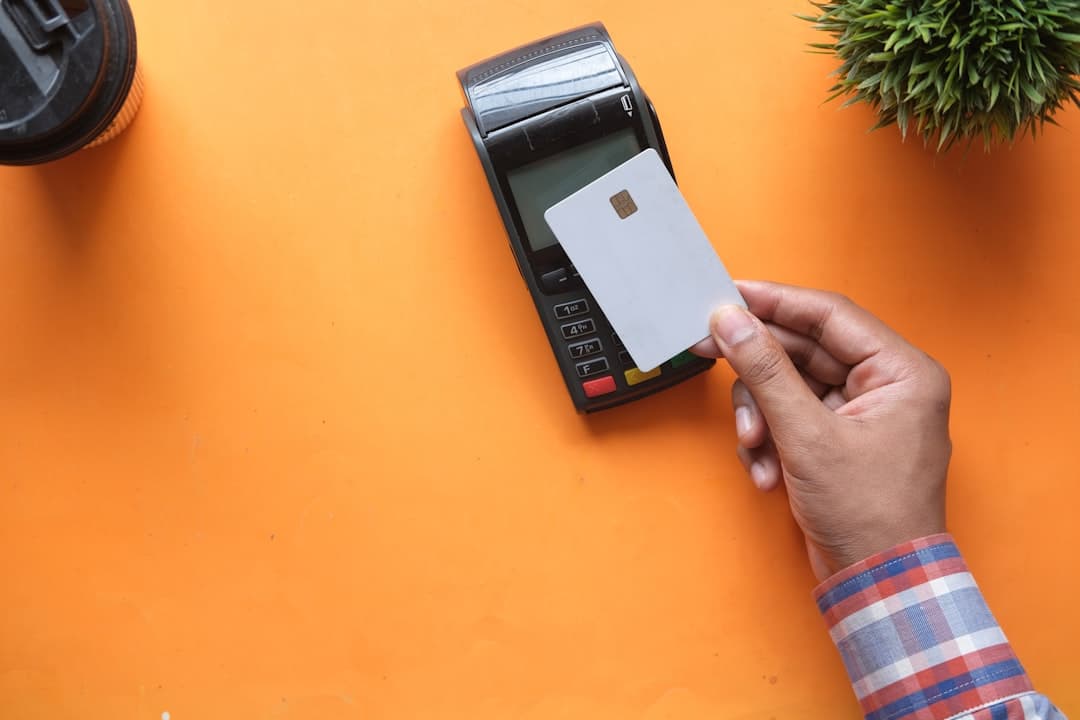
To accept Stripe payments on a Framer site, you embed a Stripe checkout link or payment button, or you connect a payment plugin that opens Stripe Checkout when a visitor clicks buy. Stripe handles the card form, security, and receipts, so you keep your Framer design clean while taking real payments in minutes.
Key takeaways
- Framer accepts Stripe payments through hosted Payment Links, embedded buy buttons, or a checkout plugin.
- Stripe Payment Links are the fastest no-code option and need only a pasted URL or button.
- Stripe hosts the card form and handles security, so sensitive data never touches your Framer site.
- Use Payment Links for one-off products and subscriptions for recurring billing.
- Always test in Stripe test mode before switching to live keys and taking real money.
- Pair Stripe with a thank-you page and email receipt to give buyers a clean post-purchase experience.
Why use Stripe with Framer
Framer gives you full control over how your product or service page looks, while Stripe is the engine that actually moves money. Stripe is trusted, handles cards and wallets, manages taxes and receipts, and keeps you out of scope for most security headaches because the card form lives on Stripe’s side. That combination lets a designer ship a polished, conversion-focused page without building a payment backend.
For consultants, creators, and small product businesses, this pairing is ideal. You design a page that sells, drop in a Stripe button, and start collecting payments the same day. There is no separate store to maintain and no heavy commerce platform to learn.
Three ways to take Stripe payments on Framer
There are three reliable methods. Each ends with Stripe processing the payment, so the difference is mostly about how much you want to design and how the checkout opens.
1. Stripe Payment Links
A Payment Link is a hosted checkout page that Stripe creates for you. You build the product or subscription inside Stripe, generate a link, and attach it to any button or text in Framer. When a visitor clicks, they land on Stripe’s secure checkout, pay, and get redirected back to a page you choose.
This is the simplest route and needs no code at all. It works for single products, services, and recurring subscriptions. The only limitation is that checkout happens on Stripe’s domain rather than inside your Framer site, which most buyers do not mind because Stripe is widely trusted.
2. Stripe buy button embed
Stripe also offers a buy button you can embed directly on your page. You configure the button in Stripe, copy the embed snippet, and paste it into a Framer embed component. The button renders on your site and opens Stripe Checkout in a modal or new view when clicked. This keeps the purchase trigger on your page while Stripe still handles the actual transaction.
3. Checkout plugin
Several Framer plugins add commerce features and connect to Stripe. These can give you a cart, product galleries, and a more store-like flow while routing payments through Stripe behind the scenes. A plugin is worth it when you sell several products and want a richer shopping experience than a single Payment Link provides.
Step by step: add a Stripe Payment Link to Framer
This is the path most teams should start with. It takes about ten minutes.
- Create a product in Stripe. In your Stripe dashboard, go to Products, add your item, and set its price. For recurring billing, choose a subscription price instead of one-time.
- Generate a Payment Link. From the product, create a Payment Link. Stripe gives you a URL that opens a hosted checkout page.
- Set the redirect. In the link settings, choose where buyers go after paying, such as a thank-you page on your Framer site.
- Add a button in Framer. Place a button or call-to-action on your page and link it to the Stripe Payment Link URL.
- Style the button. Match the button to your brand with your colors, font, and hover state so it feels native.
- Test in test mode. Use Stripe’s test mode and a test card to run a full purchase, then confirm the redirect works.
- Go live. Switch Stripe to live mode, update the link if needed, and publish your Framer site.
Once a test payment flows through cleanly and the buyer lands on your thank-you page, you are ready to take real money.
One-time payments versus subscriptions
Stripe handles both models, and the choice shapes how you set up the product. Use a one-time price for products, downloads, or single services where the buyer pays once. Use a subscription price for memberships, retainers, or any offer billed on a schedule.
Subscriptions add a few considerations. Buyers can manage or cancel through Stripe’s customer portal, and you will want to think about failed payment recovery so a declined card does not silently end a subscription. Stripe includes tools for both, so enable the customer portal and dunning settings when you launch a recurring offer.
Designing the purchase experience in Framer
The payment is only part of the experience. The page around it does the selling. Strong Framer product pages share a few traits:
- A clear headline and price. Buyers should understand what they get and what it costs without scrolling.
- One obvious call to action. Make the Stripe button the most prominent element on the page.
- Trust signals near the button. A short note that payments are secured by Stripe reassures hesitant buyers.
- A real thank-you page. After payment, send buyers to a branded page that confirms the purchase and tells them what happens next.
Because Framer makes design fast, you can test variations of these elements and watch conversion respond. Small changes to the headline or button placement often move the needle more than the checkout itself.
Testing and going live safely
Never connect live Stripe keys until you have run the full flow in test mode. In test mode, Stripe gives you card numbers that simulate success, declines, and other states. Run each one, confirm the redirect, and check that the order appears in your Stripe dashboard. Only after that should you flip to live mode.
After launch, watch your first few real transactions closely. Confirm receipts send, payouts schedule correctly, and the thank-you page loads. Catching a small issue in the first day is far easier than discovering it after a week of lost sales.
Comparing the three Stripe methods
Choosing between Payment Links, the buy button, and a checkout plugin comes down to a few practical factors. Thinking through each helps you avoid building something heavier than you need.
Payment Links are the lightest and fastest. They suit a single product, a service, or one subscription, and they need nothing but a pasted URL. If you sell one or two things and want to launch today, this is the right call. The only real downside is that the checkout opens on Stripe’s domain rather than fully inside your page.
The buy button keeps the purchase trigger on your page and opens Stripe Checkout in a modal, which feels slightly more integrated. It is a good middle option when you want the button styled on your site but still want Stripe to handle the actual form. It adds a little more code than a plain link but remains simple.
A checkout plugin is the heaviest option and the right one when you sell many products and want a cart, a product gallery, and a store-like flow. It does more, but it also adds weight and complexity, so reserve it for cases where a single Payment Link genuinely cannot do the job. For most consultants, creators, and small product businesses, Payment Links cover the need with the least overhead.
Handling taxes, receipts, and refunds
Taking the payment is only the start. Stripe also handles the operational side of selling, and configuring it once saves headaches later. Stripe can calculate and collect tax based on the buyer’s location, which matters as soon as you sell across regions. Turn this on in your Stripe settings before you scale so you are not reconciling tax by hand.
Receipts go out automatically when you enable them, giving every buyer a clean confirmation without any work on your part. Refunds are handled from the Stripe dashboard with a few clicks, and Stripe records the reversal so your reporting stays accurate. Knowing these tools exist means you can promise a smooth experience, including a clear refund path, which itself reduces purchase hesitation on your Framer page.
Keeping the checkout fast and trustworthy
A payment page lives or dies on speed and trust. Because Stripe hosts the heavy parts of checkout, your Framer page stays light when you use Payment Links or a simple button. Keep it that way by loading only the scripts you need and optimizing the images around your offer. A fast page reduces the small hesitations that cause buyers to abandon before they click.
Trust comes from clear signals. State the price plainly, note that payment is secured by Stripe near the button, and show what the buyer gets immediately after paying. A branded thank-you page confirms the purchase went through and tells them the next step, which turns a transaction into the start of a relationship rather than an anxious wait for an email.
How Stripe fits your wider Framer stack
Payments rarely stand alone. If you sell services and need buyers to book time after paying, our Framer booking integration guide shows how to add a scheduler to the same site. If you outgrow single Payment Links and want a full catalog, the Framer and Shopify integration guide covers a heavier commerce setup. And to extend checkout, carts, and analytics, our list of the best Framer plugins points to tools that build on top of Stripe.
Treat these as one connected system. A visitor can read your offer, pay through Stripe, book onboarding, and receive a receipt, all within a site you fully control in Framer.
Sell from your Framer site with Stripe done right
We design fast, high-converting Framer pages with clean Stripe checkout so you can take payments the day you launch.
Frequently Asked Questions
Can I take Stripe payments on Framer without code
Yes. Create a product in Stripe, generate a Payment Link, and attach that URL to a button in Framer. When a visitor clicks, Stripe handles the secure checkout, so no custom code is needed.
Does Stripe checkout happen on my Framer site or on Stripe
With Payment Links and the standard buy button, the card form is hosted by Stripe. This keeps sensitive payment data off your Framer site and reduces your security burden while still feeling seamless to the buyer.
Can I sell subscriptions through Framer and Stripe
Yes. Create a recurring price in Stripe and generate a Payment Link for it. Stripe manages the billing schedule and gives customers a portal to manage or cancel, all linked from your Framer page.
How do I test Stripe before taking real payments
Switch Stripe to test mode and use the test card numbers Stripe provides to simulate successful and declined payments. Confirm the redirect and dashboard entry work, then move to live mode for real transactions.